How to Supply Print Ready Artwork
“Print-Ready” is a term used to describe a file that has all the specifications necessary to produce high-resolution printed output, without requiring any additional alteration from the printer. Please follow the guidelines below when sending files.
If your file is not saved in the correct format, we will not be able to use it as “Print Ready” artwork and you may need to resupply the artwork. Alternatively, we can assist you in preparing your artwork for an additional design fee.
We do not accept Microsoft Word, PowerPoint or Publisher files. Although they may be fine for printing on a desktop printer, text and images can often appear very different when opened on other computers.
Guidance for supplying final print-ready artwork:
- File format: Please supply all artwork in high-resolution PDF format.
- Colour: All colour files must be in CMYK mode (not RGB as this format was created to represent colours on screen only). It is also important to work in CMYK from the outset when creating artwork and defining colours. If you create your artwork in RGB and then convert to CMYK at a later stage, the colours (especially black) may be negatively affected. See Figure 1.1 below.
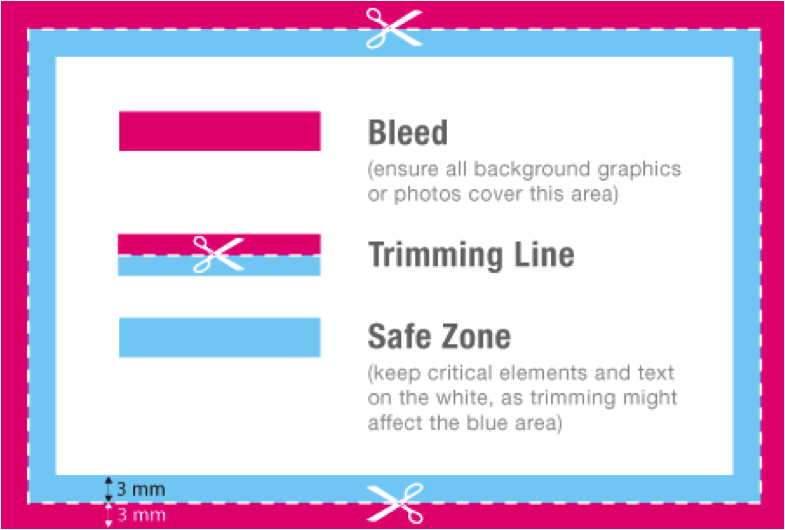
- Bleed: The bleed is the area that gets trimmed so that no unprinted edges occur in the final trimmed document. Please ensure there is a 3mm bleed around the PDF (i.e. save the PDF with 6mm added to each measurement). See figure 1.2 and 1.3 below.
- Trim Lines and Cut Marks: These marks indicate where the product is cut down to the desired size and refer to the end of the paper or finished size of a product. These marks should be included on all print-ready artwork. See figure 1.3 below.
- Safe Margin: This is the area between the text and graphics that are not meant to be trimmed. See figure 1.3 below.
Figure 1.1: CYMK Print Settings
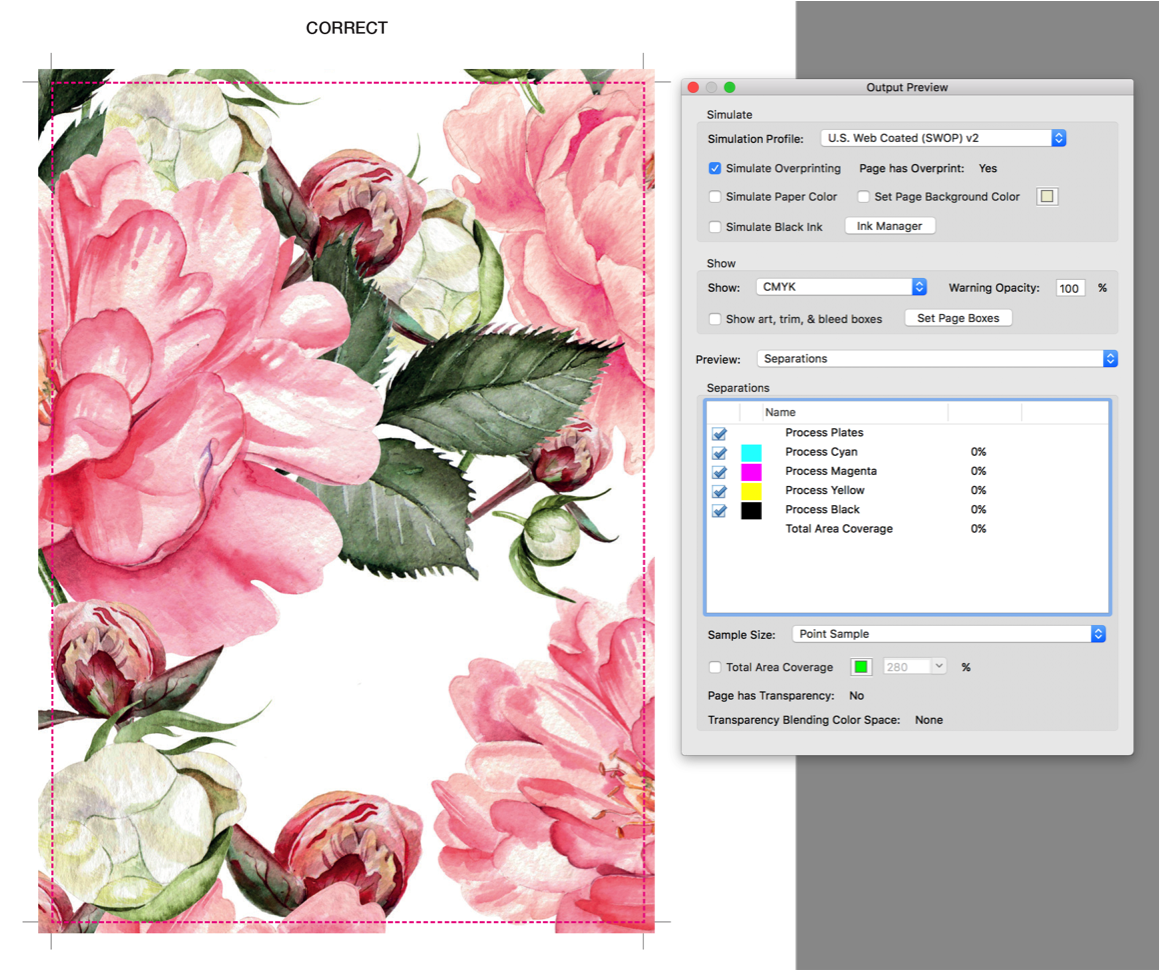
Figure 1.2: Bleed Specifications
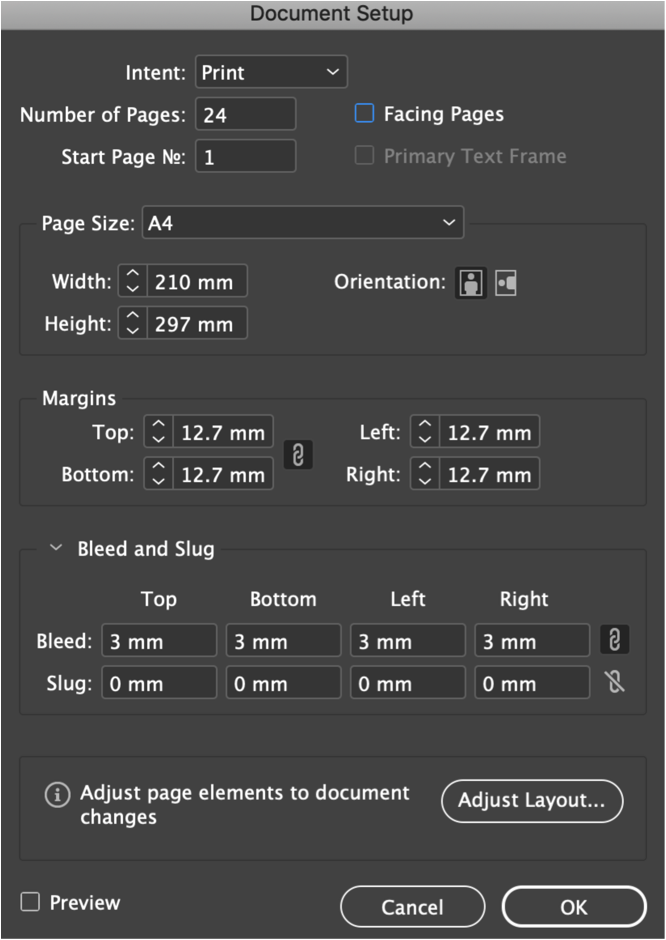
Figure 1.3: Bleed, Trim, Margin Example
Guidance for Photographs, Logos, Drawings and Images:
- Photographs & Drawings: Photographs should be provided in TIFF or JPEG format
- Logos: Logos should be provided in EPS or PDF Vector format (see below for vector description)
- Images: Images should be provided in a resolution of between 300 and 350dpi. If artwork is generated at a lower resolution, then the quality of the final printed job will be affected. The artwork must be generated at a resolution of 350dpi from the outset, as it cannot be enhanced at a later stage. It is not possible to use images from the Internet, as they have been optimized for computer screens in order to keep the file size down.
- Vector vs Raster Images: If you’re working with vector files, you don’t need to worry about ppi (pixels per inch). However, if you’re working with raster images, please ensure that the image resolution is at least 300ppi before submitting your artwork. While 72ppi is the standard for digital and web design, printing requires at least 300ppi in order to achieve the best quality print.
- Please note, text should not be created in Photoshop
Guidance for Booklets and Leaflets
Artwork for multi-page jobs, such as booklets and leaflets should be supplied at the finished size. Please supply artwork in single pages (not spreads) with bleed on all sides. This allows for binding requirements. When supplying PDFs, it is important to ensure that each file is accurately labelled and numbered in order of appearance including any blanks.
Guidance for Printing in Spot Colour (not CMYK)
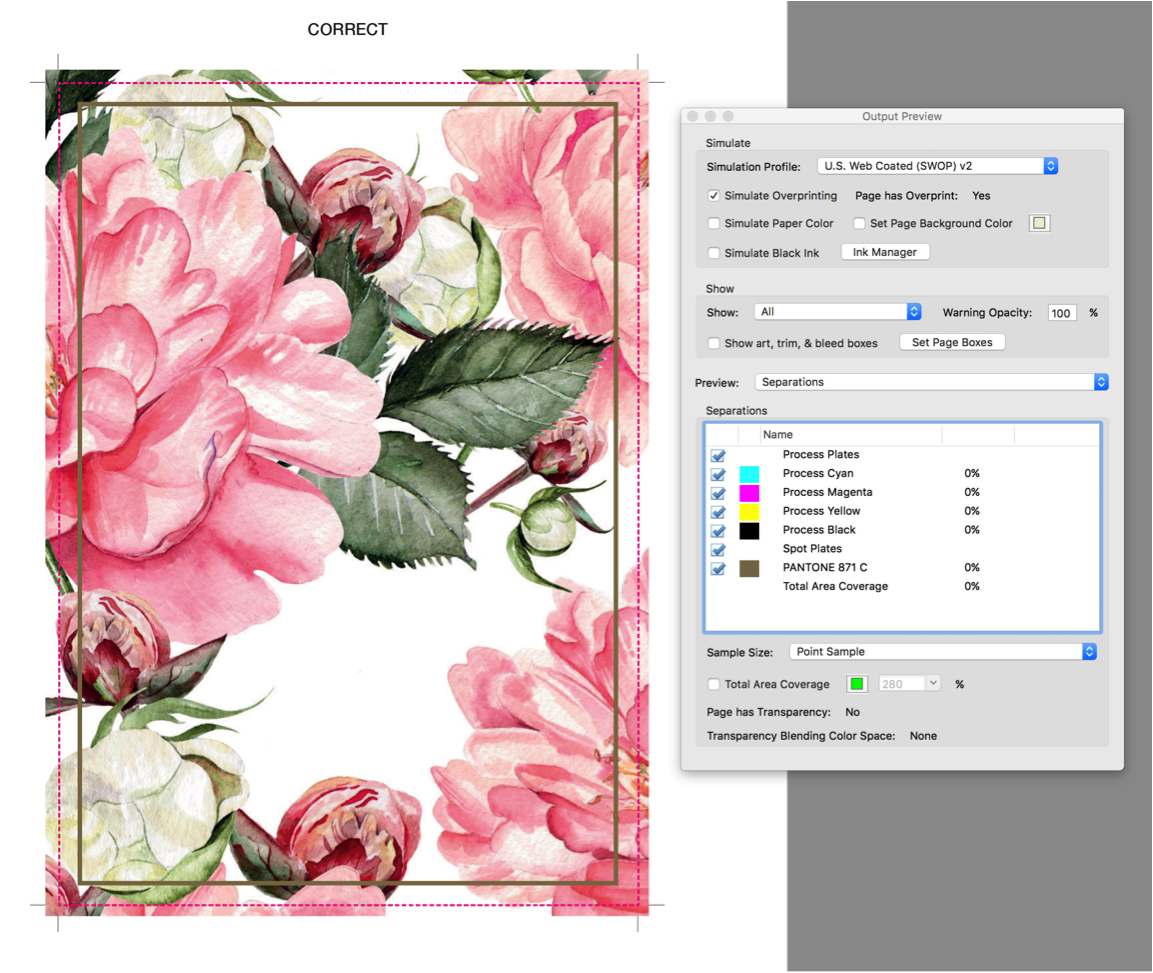
Spot colour printing is a traditional method where the colours are applied individually in layers, eventually filling in all of the spots in your custom design. If we are printing in a spot colour (not full colour CMYK) then please ensure all spot colours within your job are clearly marked with their Pantone colour reference (i.e. PANTONE 280C or PANTONE 032 U) and are set to ‘SPOT’ not ‘PROCESS.’ The ‘C’ or ‘U’ attached to the Pantone number refers to the material you are printing on, Coated vs Uncoated and the actual printed ink colours will vary depending on the substrate (paper/board). See figure 1.4 below.
Guidance for Printing Special Processes in your Design:
When incorporating any special processes into your design (other than colour print), please ensure that all non-printable elements within your artwork are set as ‘SPOT’ colours and named as follows:
- CUTTER – Die cutting lines, when showing folder outlines or irregular cutting etc
- PERF – To show where a job is to be perforated
- CREASE – To show where a job is to be creased
- EMBOSS – To indicate which areas are to be blind embossed
- FOIL or ENGRAVED – To indicate areas which are to be foil blocked or die stamped / engraved
Figure 1.4: Spot Colour Settings